Before we dive into the current project, here is a small but important update:
WaterFeeler 3 Status
I've been working on and off on the next generation of WaterFeeler (3 and above), but i've run into two kinds of problems: First, i started a new job a few months ago and i'm in charge of a sort of large project which takes up a lot of my time and energy. And secondly, i'v run into all kinds of Problems with the WaterFeeler3 hardware itself, including some instances of releasing the magic smoke from electronic components.
There is also the real problem of fitting all the required software into the tiny amount of Arduino memory i have. This will take a lot more engineering to solve.
So, WaterFeeler 3 is not going to "fly" this winter. Which leaves me with another winter of no engineering data.
The problem with winter
I'm pretty sure i can keep the electronics working without fuzz, even in the coldest winter that nature can throw at me in my area. The problems are liquids and lithium batteries:
As mentioned in previous articles (and the main reason i so far have avoided rechargable lithium batteries) is that they hate the cold. If it's below freezing and you are trying to charge them, they might decide to explode after thawing. So, optimally they must be kept above freezing at all times to keep them safe and in usable condition.
Future missions might also include some experiments with fluids, mostly water and water-based stuff. Missions like these will also have to be kept above freezing to survive.
If i want to design a probe that can survive a whole year, i need to learn much more about probes under winter conditions.
Operation Snowflake
To solve that problem and to prepare for a working full year mission with WaterFeeler 3 (hopefully to launch during spring/summer of 2020), i'm launching a dedicated mission in the next couple of weeks.
The (simplified) main goals are:
- Keep it very simple
- Test survival heaters
- Get as much engineering data as possible
- Use 3D prrinting for the housing instead of botching some plastic box into shape.
- Test insulation
- Log real power usage relating to outside temperature
There are no planned "pure" science experiments, except one external temperature/humidity sensor and maybe one of the improved soil humidity sensors.
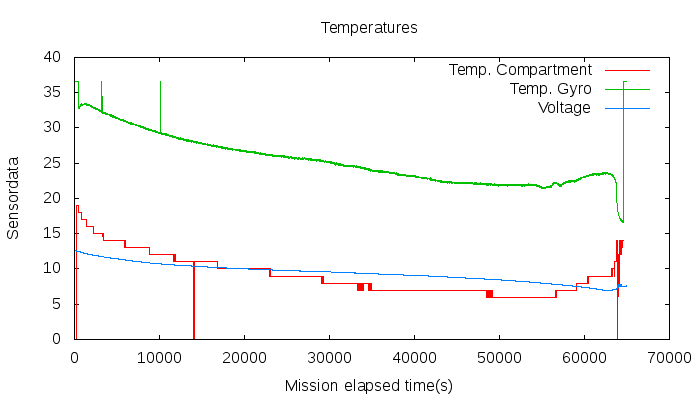
So far, we only had one test mission that really gave us some hard data under winter conditions: FAST CORE. While it only worked for some 18 hours, it survived a cold winter night with passive insulation:
Back in January 2018 i wrote:
This proves the insulation concept of Scotty class probes. There will be a requirement for active heating for long duration solar probes, mostly to warm up the compartment to suitable temperatures for recharging and to survive extrem conditions ("survival heaters").
Operation Snowflake is a direct follow up to that, except that it will use Solstice as a power source except having it's own solar panels.
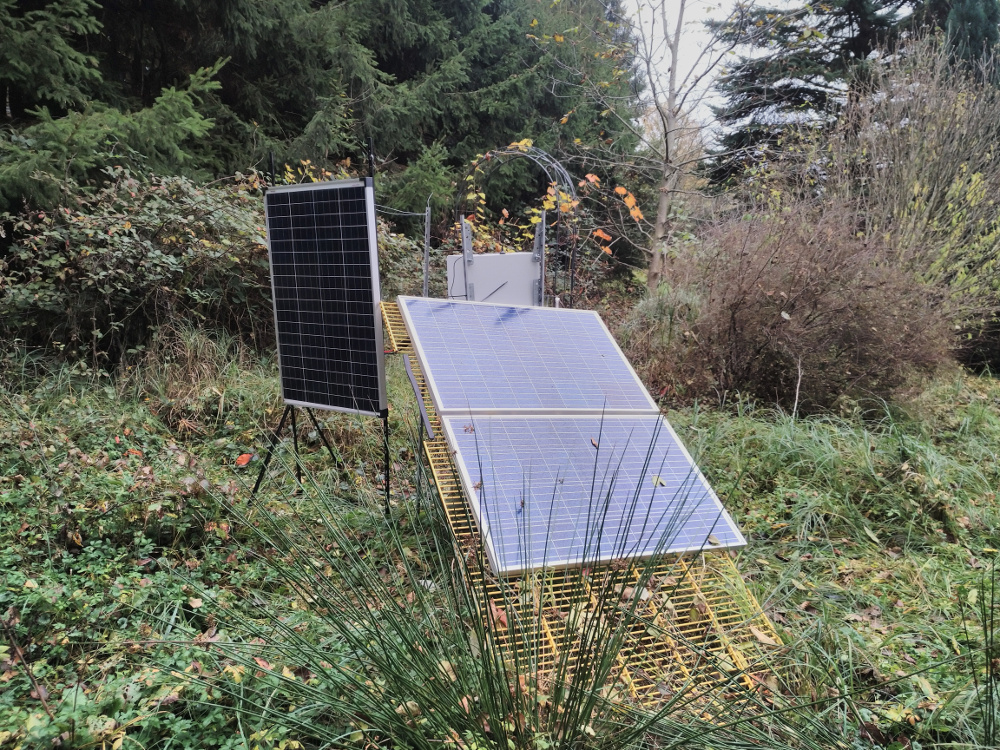
Solstice
Solstice now sports a strange 3 panel setup. Two of the panels are aimed at the morning/midday sun, the third (upright) panel catches a few watts during the last hours of sunlight. During summer, i got tons of power, but during October this has gone down dramatically. The reason is simple: The sun is now below the treetops most of the time, but there are still leaves on the trees.
Power estimates
Before we do this, i'm running into the same problem that Andy Weir had when writing "The Martian". I'm spending half the time talking about "watt-hours per day". Switching to "pirate ninjas" doesn't help because a) it describes kilowatt-hours and b) it's per Martian day ("Sol").
I need "watt hours per earth day". Let's call them "suds" ("Solar Units per Day").
The FAST CORE mission used about 20 watt-hours during it's 16 hour live, which nearly kept its temperature somewhat stable. It doesn't really matter that much that it didn't have active heater, since all power "used" turned into energy at the end. The Arduino i'm planning to use for this project is more power efficient (which is good for spring and summer when cooling will become a problem). But in winter, we need to make up the rest of the heating by other means, in our case by using carbon fibre floor heating wire i happen to get from Ebay very cheaply a few months ago.
My personal estimate is that i can supply between 30-40 watthours per day from Solstice during winter months. Let's say i can do 40 watthours per day after all the leaves have fallen. This should be able to keep the temperature of the probe electronics above freezing.
Many days we will get a lot less suds, but one or two sunny days per week will more than make up for it. I got a 12V 120 Amp-hours battery in Solstice, thats 1440 watthours, giving me about 36 days (in theory, see below) use even with no sunshine at all.
Well, the charger as well as the Solstice electronics will take their share of that, roughly 10-15 suds. But that's the price you pay for getting good, regular telemetry.
"KISS" software design
The probe software can't be updated during the mission because we don't have a Raspberry Pi onboard and the Atmel chips on the Arduino are so outdated that they can't update themselfs. This means we have to make the on board software very reliable - KISS ("keep it simple stupid"). In an emergency, we can power cycle via Solstice, but that is about it.
So, the plan is to use a proven good software, like that one from WaterFeeler 2 or from Solstice and implement a minimal sensor downlink and a minimal "turn heaters on or off when the temperature gets out of range" control loop.
The "higher brain functions", e.g. tuning the upper and lower temperature limits for each heater will be implemented remotely via mission control commands. The same goes for all kinds of tests (simulated failure of a heater, simulated fan failure, etc), those will be done by remote controlled manual commanding and monitoring.
Housing
The main housing of the probe will be 3D printed in PLA and then insulated similar to FAST CORE. Here are the main elements, from top to bottom:
Lid
This is just the lid that lets air circulate from the main cavity through the fan into the side cavities with the heaters.
Fan module
The fan module houses the 8cm computer fan and sits on top of the main body.
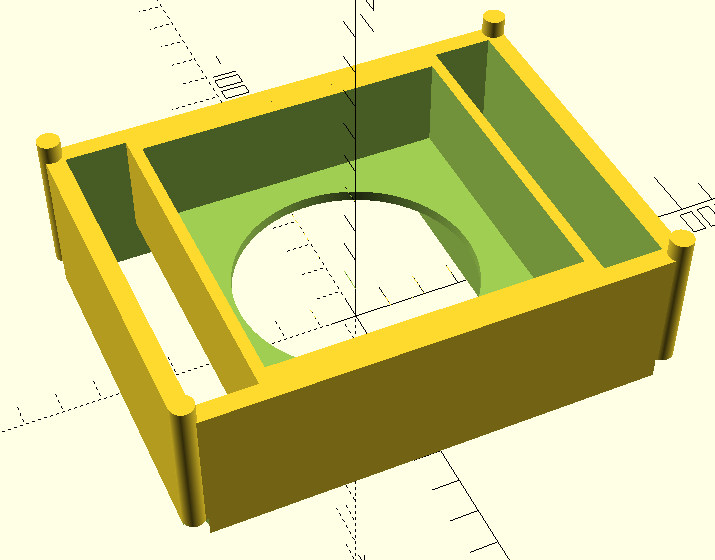
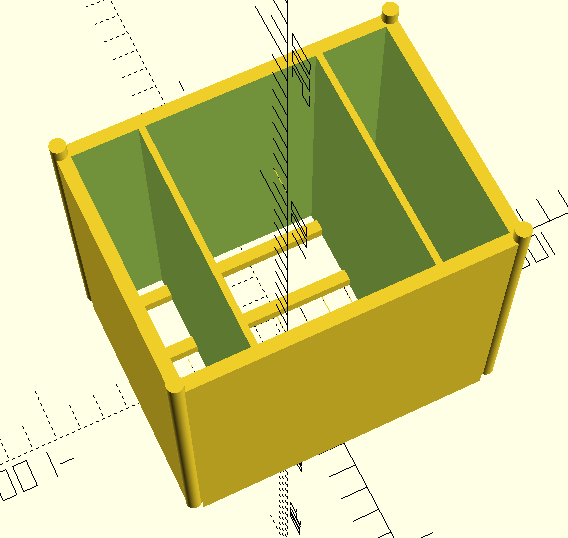
Main body
The main probe body houses the Arduino and other electronics in the center cavity. The "side pockets" allow air flow from the lid to the bottom heater assembly. Those side pockets also hold one 4 Watt heater each which will be used for fast heating (they are in the middle of the air flow).
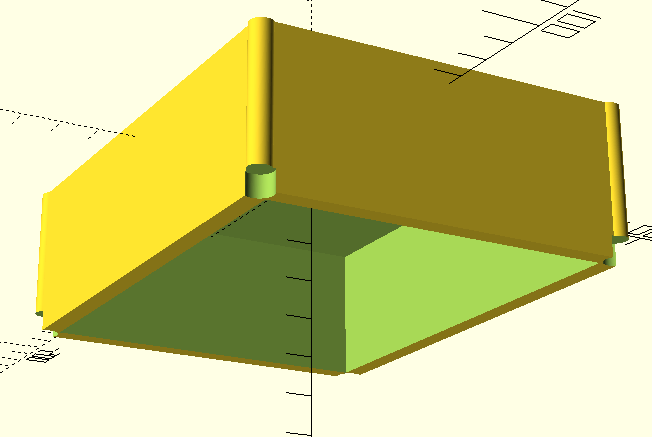
Bottom heater cavity
The bottom heater cavity will hold another (roughly) 4-8 Watt heater, but this one with additional "filler" for higher heat retention. This one will mostly run during the day (when up to a higher temperature and then release a small amount of heat over a longer time period. While not fully able to keep warm until the next sunrise, this will allow me to experiment in using solar power more directly, without the losses of storing power in the battery and then pulling it out again.
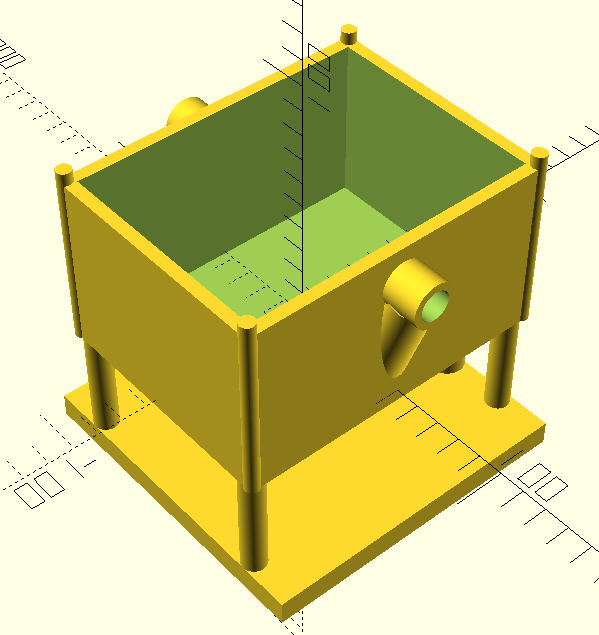
This part also has the foot (stand) and attachment points for two "arms" that will hold the antenna and the external temperature/humidity sensor respectively. I am still working on designing those arms while the other parts are printing. |
